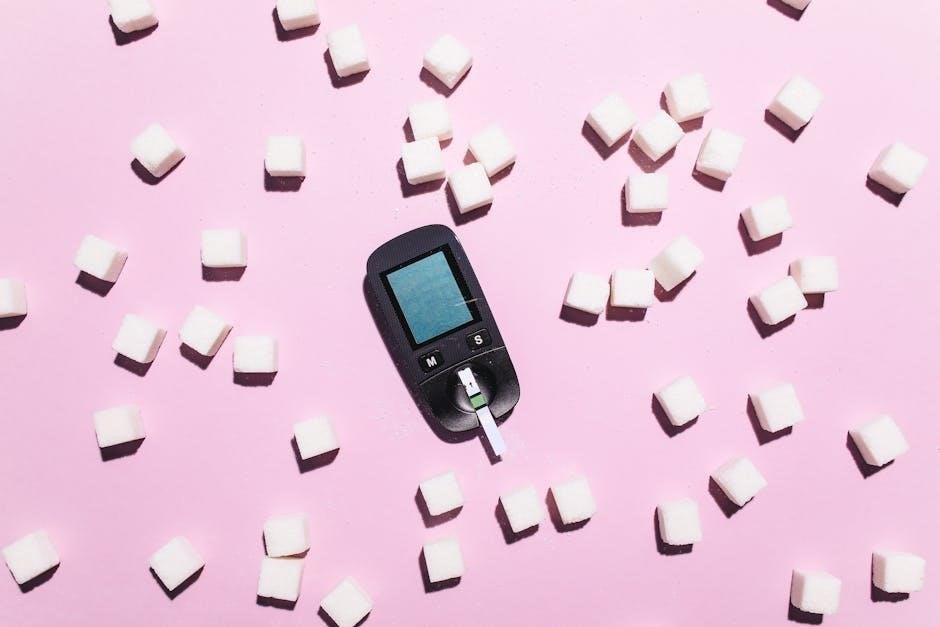
The FreeStyle Lite Glucose Meter is a portable, user-friendly blood glucose monitoring system designed for easy glucose tracking. It offers precise readings with minimal blood sample requirements, making it ideal for daily diabetes management.
1.1 Overview of the Freestyle Lite Glucose Meter
The FreeStyle Lite Glucose Meter is a compact and easy-to-use blood glucose monitoring system designed for people with diabetes. It provides accurate glucose readings using a small blood sample size of 0.3 microliters, making it convenient for daily use. The meter is known for its portability and discreet design, allowing users to test their blood glucose levels anytime, anywhere. It supports testing from various sites, including fingers, forearm, upper arm, hand, thigh, or calf, reducing fingertip discomfort. The FreeStyle Lite uses GDH-FAD chemistry, which minimizes interference from non-glucose sugars, ensuring reliable results. With no coding required, the meter offers a straightforward testing process and quick results in just five seconds. Its lightweight and user-friendly interface make it a popular choice for managing diabetes effectively. The system is FDA-cleared and designed to meet the needs of individuals seeking precise and hassle-free glucose monitoring.
1.2 Importance of Proper Use and Understanding
Proper use and understanding of the FreeStyle Lite Glucose Meter are crucial for accurate glucose readings and effective diabetes management. Incorrect use can lead to misleading results, potentially affecting treatment decisions. Users must follow the manual’s guidelines for preparing the meter, testing sites, and handling test strips to ensure reliability. The meter’s design simplifies testing, but adherence to instructions is essential to avoid errors. Understanding the device’s features, such as its GDH-FAD chemistry and alternative testing sites, enhances user confidence and compliance. Regular maintenance and troubleshooting also play a key role in maintaining accuracy. By following the manual and understanding the meter’s functionality, users can rely on precise results to manage their condition effectively. Proper use not only ensures accurate glucose monitoring but also supports overall health and well-being for individuals with diabetes.
Technical Specifications of the Freestyle Lite
The FreeStyle Lite Glucose Meter uses GDH-FAD chemistry for accurate glucose measurement, requiring a small 0.4µL blood sample with results in 7 seconds.
2.1 Key Features and Functionality
The FreeStyle Lite Glucose Meter is designed for simplicity and accuracy, offering a range of user-friendly features. It requires no coding, eliminating the need for manual calibration before testing. The meter is compact and lightweight, making it highly portable for on-the-go use. It provides quick results, displaying blood glucose levels in just 7 seconds, and requires only a tiny 0.4µL blood sample. The large, easy-to-read display ensures clear visibility, even for individuals with vision impairments. Additionally, the meter includes a backlit screen for testing in low-light conditions. It also stores up to 400 test results, allowing users to track their glucose levels over time. The FreeStyle Lite is compatible with FreeStyle test strips, which are designed for accurate and reliable glucose measurement. These features make it an ideal choice for individuals managing diabetes who value convenience and precision in their daily glucose monitoring routine.
2.2 Measurement Range and Accuracy Levels
The FreeStyle Lite Glucose Meter is designed to measure blood glucose levels within a broad range of 20 to 500 mg/dL, ensuring accurate readings for both hypoglycemic and hyperglycemic conditions. The meter meets rigorous industry standards for accuracy, delivering results that are within ±8% of laboratory values for glucose levels above 100 mg/dL and within ±10% for levels below 100 mg/dL. This level of precision ensures reliable glucose monitoring, which is critical for effective diabetes management. The FreeStyle Lite also incorporates advanced algorithms to minimize interference from factors such as altitude or certain medications, further enhancing its accuracy. These features make it a trusted tool for individuals requiring precise glucose monitoring to guide their treatment decisions and maintain optimal health outcomes.
2.3 Sample Size Requirements for Testing
The FreeStyle Lite Glucose Meter requires a small blood sample size of approximately 0.4 microliters for accurate glucose measurement. This makes it ideal for individuals who may find it difficult to obtain larger blood samples, such as those with fragile or sensitive skin. The meter is designed to ensure minimal blood is needed, reducing discomfort during testing. The test strip features a unique “strip-fill” detection system, which automatically recognizes when the appropriate sample size is applied. This eliminates the need for timing or manual confirmation, providing a quick and hassle-free testing experience. The FreeStyle Lite also offers visual confirmation when the sample is adequate, ensuring reliable results. By requiring such a small sample, the meter enhances user convenience while maintaining high levels of accuracy and performance. This feature is particularly beneficial for frequent testers seeking a seamless glucose monitoring process.
2.4 Battery Life and Power Management
The FreeStyle Lite Glucose Meter is powered by a single CR2032 lithium battery, which provides a long lifespan of approximately 1,000 tests under normal usage conditions. The meter is designed with efficient power management to ensure extended battery life, making it a reliable option for daily glucose monitoring. It features an automatic shut-off function that turns the device off after one minute of inactivity, helping to conserve battery power. A low-battery indicator alerts the user when the battery needs to be replaced, ensuring uninterrupted testing. Replacing the battery is straightforward and requires minimal effort, with no need for complex tools or synchronization. The meter also retains its memory and settings during battery replacement, providing a seamless user experience. This robust battery life and intelligent power management make the FreeStyle Lite a convenient choice for managing diabetes care. The durable design ensures consistent performance over time.
How the Freestyle Lite Glucose Meter Works
The FreeStyle Lite Glucose Meter measures blood glucose levels using advanced GDH-FAD technology. It analyzes a small blood sample to provide accurate readings, helping users manage their diabetes effectively.
3.1 GDH-FAD Chemistry Explanation
The FreeStyle Lite Glucose Meter utilizes GDH-FAD (glucose dehydrogenase flavin adenine dinucleotide) chemistry to measure blood glucose levels. This enzyme-based technology oxidizes glucose in the blood sample, generating an electrical current proportional to the glucose concentration. The test strip contains GDH-FAD enzymes and a mediator that facilitate the electron transfer during the glucose oxidation process. When a blood sample is applied, the glucose reacts with the enzymes, triggering an electrochemical reaction. The meter detects this current and converts it into a numerical glucose reading. This chemistry ensures accurate and reliable results, even at low glucose levels. The GDH-FAD system is known for its stability and resistance to interference from other substances, making it a robust choice for blood glucose monitoring.
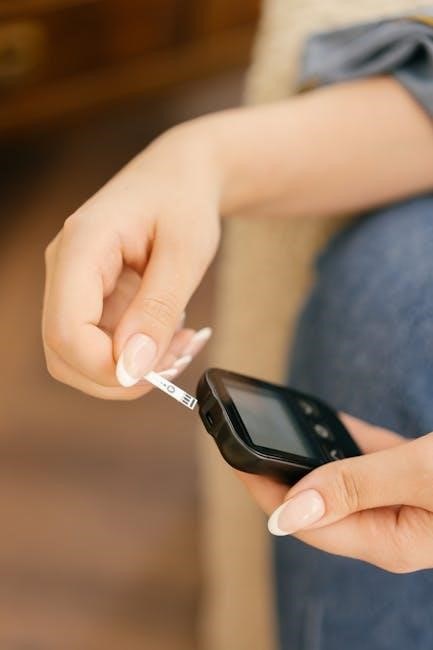
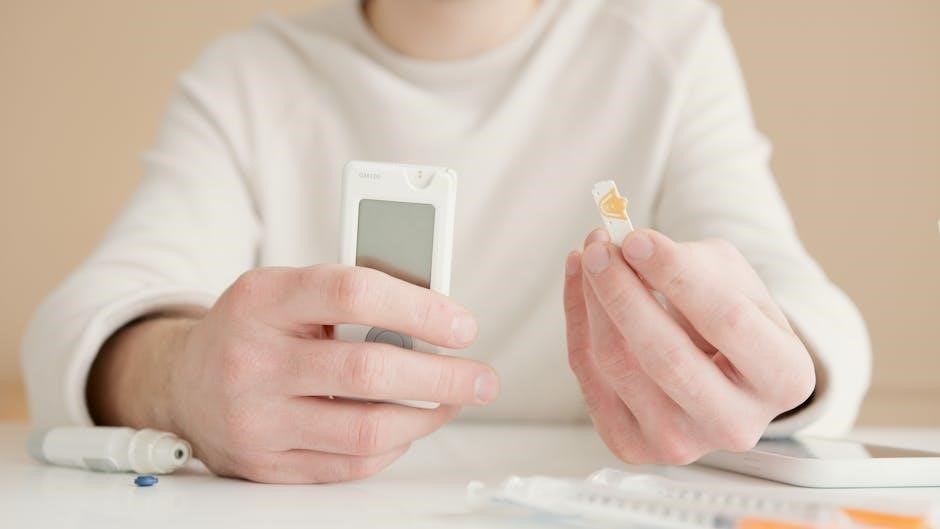
3.2 The Blood Glucose Testing Process
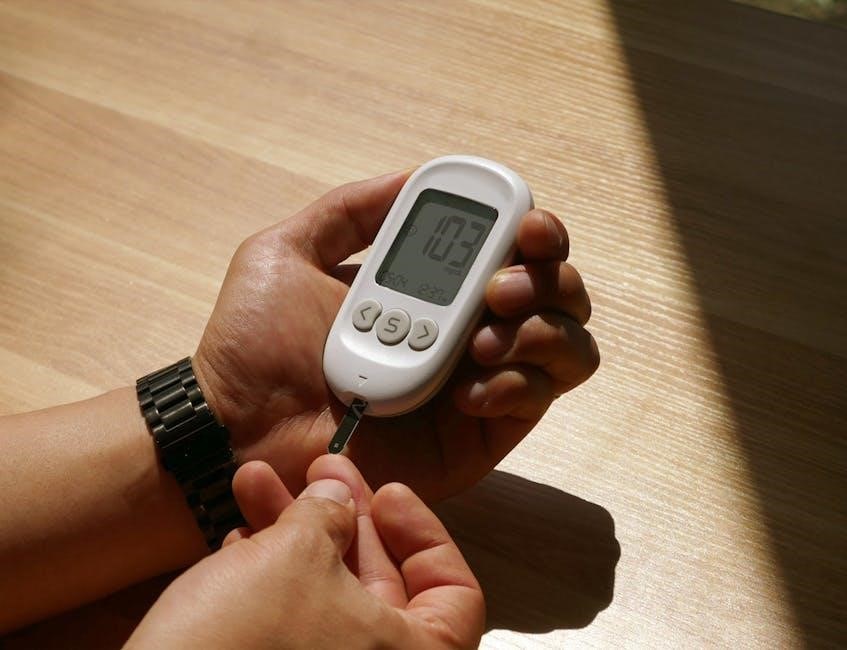
The FreeStyle Lite Glucose Meter simplifies blood glucose testing through a straightforward process. Begin by washing and drying your hands to ensure cleanliness. Next, prepare the meter by inserting a test strip, which automatically activates the device. Use the provided lancet to obtain a small blood sample, typically from the fingertip, although alternative sites like the palm or forearm can also be used. Gently touch the blood sample to the test strip’s application area, ensuring it fills the target zone completely. The meter will analyze the sample and display the glucose reading within a few seconds. Proper technique, such as holding the lancet at the correct angle and obtaining an adequate blood sample, is essential for accurate results. Always follow the manual’s guidelines for testing to ensure reliable and consistent glucose monitoring.
Getting Started with the Freestyle Lite
Welcome to the FreeStyle Lite Glucose Meter quick start guide. This section helps you get started with unboxing, initial setup, and preparing for your first use.
4.1 Unboxing and Initial Setup
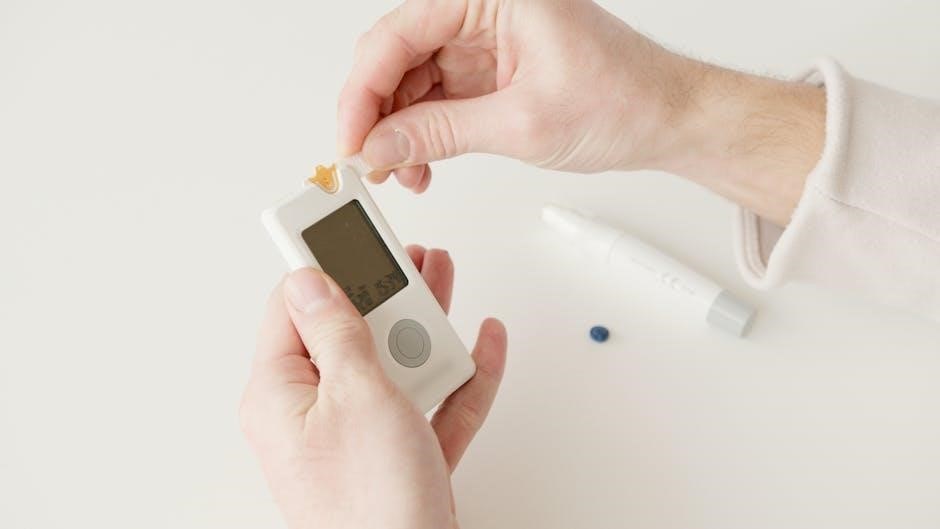
Upon unboxing the FreeStyle Lite Glucose Meter, you’ll find the meter itself, a user manual, a lancing device, lancets, a carrying case, and a test strip sample. Ensure all items are included and undamaged. Insert the battery (if not pre-installed) and familiarize yourself with the meter’s buttons and display. Before first use, insert the provided code chip into the meter to activate it. This step ensures accurate readings. Store the remaining code chips in a safe place, as they are required for future use. The meter is designed for ease of use, with a large display and simple navigation. Once set up, the FreeStyle Lite is ready for blood glucose testing. Always refer to the user manual for detailed instructions and safety precautions during the initial setup process.
4.2 Preparing for the First Use
Before using your FreeStyle Lite Glucose Meter for the first time, ensure you have read the user manual thoroughly to understand its operation and safety guidelines. Familiarize yourself with the meter’s components, such as the test strip port, display screen, and buttons. Gather all necessary accessories, including test strips, lancets, and the lancing device. Ensure the test strips are not expired and are stored properly. Set the date and time on the meter if required. Wash your hands with soap and water before handling the meter or performing a test. Allow the meter to reach room temperature if it has been stored in a cold environment. Proper preparation ensures accurate and reliable results. Taking these steps will help you feel confident and ready for your first blood glucose test.
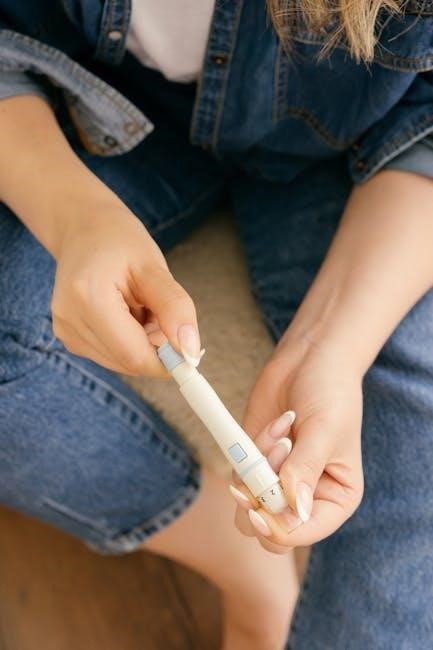
4.3 Understanding the Meter’s Components
The FreeStyle Lite Glucose Meter is designed with user-friendly components to ensure ease of use. The meter features a large, easy-to-read display screen that shows test results, error messages, and navigation prompts. The test strip port is located on the top of the meter and is where you insert the test strips for blood glucose testing. The meter also has two navigation buttons on the front, used for scrolling through menus and settings. On the back, there is a battery compartment that holds the meter’s power source, typically a lithium battery. Additionally, the meter includes a serial port for connecting to a computer or data management system. Familiarizing yourself with these components will help you navigate and operate the meter confidently. Understanding each part ensures you can perform tests accurately and troubleshoot if needed. This design promotes simplicity and efficiency for daily glucose monitoring.
Using the Freestyle Lite Glucose Meter
The FreeStyle Lite meter simplifies blood glucose testing with easy-to-use features. Insert a test strip, apply a small blood sample, and receive accurate results in seconds. The meter’s large display and built-in light enhance readability, making testing convenient day or night. Regular use helps users monitor and manage their glucose levels effectively, promoting better health outcomes. The meter’s intuitive design ensures a seamless testing experience for individuals of all skill levels.
5.1 Step-by-Step Testing Procedure
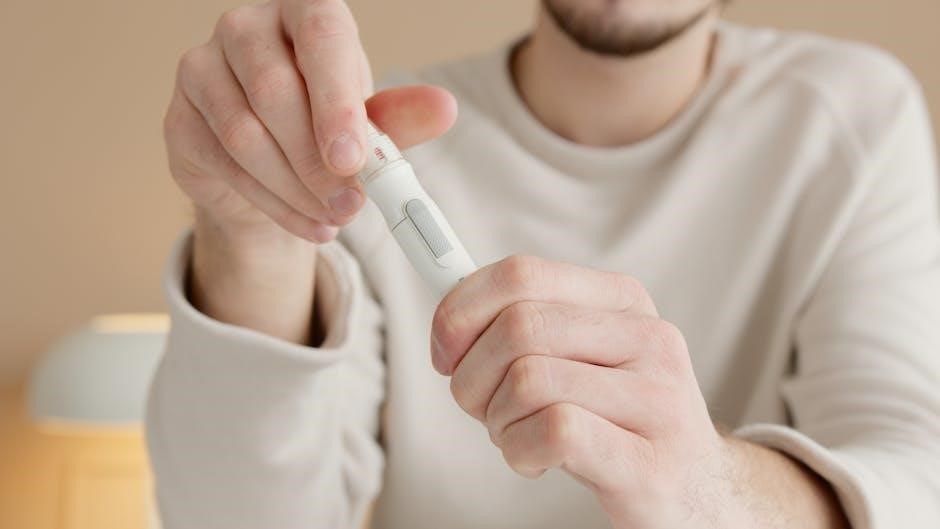
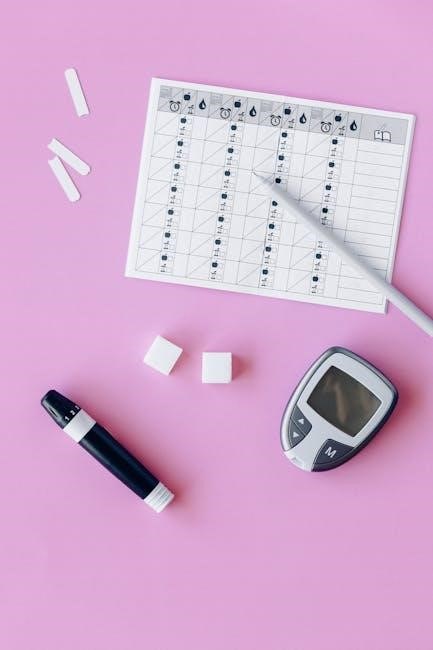
Begin by turning on the FreeStyle Lite glucose meter. Insert a FreeStyle Lite test strip into the meter, ensuring it clicks into place. Next, prepare your finger by washing and drying it thoroughly. Use the provided lancing device to obtain a small blood sample. Gently touch the blood sample to the test strip’s sample area. The meter will automatically detect the sample and begin processing. Wait for the result to appear on the display, which typically takes 5 seconds. The meter will store the result along with the date and time. If an error occurs, refer to the error codes section for troubleshooting. Always follow proper hygiene practices and dispose of used strips and lancets safely. This straightforward process ensures accurate and reliable glucose monitoring.
5.2 Alternative Testing Sites and Techniques
The FreeStyle Lite glucose meter allows for alternative site testing, providing flexibility for users. In addition to fingertip testing, blood samples can be taken from the palm, forearm, thigh, or calf. These alternative sites are especially useful when fingertips are sore or calloused. To ensure accuracy, perform the test when your hands are warm and clean. For alternative site testing, wait at least 2 hours after eating or drinking to avoid inaccurate results. Gently press the lancing device to the selected site, then apply the blood sample to the test strip. Results remain consistent across all testing sites. Always rotate testing sites to avoid discomfort and ensure proper circulation. This feature enhances convenience while maintaining reliable glucose monitoring.

Maintenance and Troubleshooting
Regular cleaning and proper storage ensure optimal performance. Replace batteries timely and check for error codes. Troubleshoot issues like inaccurate readings or meter malfunctions by consulting the user manual or contacting support.
6.1 Care and Maintenance Tips
Proper care ensures the Freestyle Lite glucose meter functions accurately. Clean the meter regularly with a soft, dry cloth and mild soap solution, avoiding harsh chemicals. Store it in a cool, dry place, away from direct sunlight. Avoid exposing the meter to extreme temperatures or moisture, which can affect performance. Check the battery level regularly and replace it when low to prevent sudden shutdowns. Use only Abbott-approved strips to maintain accuracy and compatibility. Calibrate the meter as instructed, especially when opening a new pack of test strips. Keep the meter away from children and pets to prevent accidental damage. Regularly review and follow the user manual guidelines for optimal maintenance. Proper care extends the lifespan and ensures reliable blood glucose monitoring.
6.2 Cleaning the Meter
Cleaning the Freestyle Lite glucose meter is essential for maintaining its accuracy and longevity. Use a soft, dry cloth to gently wipe the exterior, removing any dirt or residue. For more thorough cleaning, dampen the cloth with a mild soap solution, but ensure no moisture enters the openings. Avoid using harsh chemicals, abrasive cleaners, or alcohol, as these can damage the meter; Never submerge the device in water or expose it to excessive moisture, which could harm the internal components. Regular cleaning helps prevent contamination and ensures reliable performance. Always dry the meter thoroughly after cleaning to maintain its functionality. By following these steps, you can keep your Freestyle Lite in optimal condition and ensure accurate blood glucose readings.
6.3 Common Issues and Solutions
Common issues with the Freestyle Lite glucose meter can often be resolved with simple troubleshooting. One frequent issue is inaccurate readings, which may occur due to expired or improperly stored test strips. Always check the expiration date and ensure strips are stored in their original container. Another issue is error codes, such as “E-1” or “E-2,” which typically indicate strip errors or meter malfunctions. Refer to the user manual for specific error code meanings. If the meter fails to turn on, check the battery life or ensure the battery compartment is clean and free of corrosion. For inconsistent results, ensure proper fingerstick technique and sufficient blood sample size. If problems persist, contact Abbott Diabetes Care customer support for assistance. Regular maintenance and proper usage can help minimize these issues and ensure accurate glucose monitoring.
6.4 Understanding Error Codes
The Freestyle Lite glucose meter displays error codes to alert users of specific issues. These codes, such as “E-1” or “E-2,” provide guidance for troubleshooting. For example, an “E-1” error may indicate a problem with the test strip, such as improper insertion or damage. An “E-2” error could signify a meter malfunction or faulty sensor. Other codes may relate to temperature extremes, battery issues, or incorrect calibration. Always refer to the user manual for a detailed explanation of each error code. If an error persists after troubleshooting, contact Abbott Diabetes Care customer support for further assistance. Understanding and addressing these codes ensures accurate glucose readings and optimal meter performance. Regularly reviewing the manual can help users familiarize themselves with common error codes and their solutions.
Regulatory and Safety Information
The Freestyle Lite glucose meter complies with FDA regulations and international safety standards, ensuring reliable performance and user safety. Always follow guidelines for safe and effective use.
7.1 FDA Clearance and Compliance
The Freestyle Lite glucose meter has received FDA clearance, ensuring it meets rigorous safety and performance standards. It is designed to provide accurate blood glucose readings, adhering to FDA guidelines for medical devices. Compliance with these standards guarantees reliability and safety for users. The meter is manufactured under strict quality control processes to maintain consistency and accuracy. Users must follow all instructions provided in the manual to ensure compliance with FDA recommendations. Proper use and maintenance are essential to uphold the device’s performance and safety features. Always verify that the meter and test strips are used in accordance with FDA-cleared indications. For detailed information on compliance and regulatory status, consult the user manual or contact Abbott Diabetes Care. This ensures optimal functionality and adherence to safety protocols.