Discover the simplicity of creating a DIY knife sharpening angle guide to achieve precise, consistent edges․ Perfect for novices and experts, it ensures razor-sharp results with minimal effort, offering a cost-effective solution for maintaining your blades․
1․1 Importance of Sharpening Angles
Sharpening angles are critical for achieving a knife’s optimal performance․ A smaller angle (7-15 degrees) creates a sharper edge for soft materials but may weaken the blade, while larger angles (30-35 degrees) suit heavy-duty tools like axes․ Consistency in maintaining the correct angle ensures a balanced edge, enhancing cutting efficiency and durability․ Incorrect angles can lead to a dull or unstable blade, making the sharpening process ineffective and potentially dangerous․
1․2 Benefits of a DIY Angle Guide
A DIY knife sharpening angle guide offers precision, consistency, and ease of use․ It ensures uniform bevels, transforming your sharpening process and delivering razor-sharp results․ Suitable for all skill levels, it prevents misalignment and potential injuries․ Additionally, a homemade guide is cost-effective, adaptable to various knife types, and enhances sharpening efficiency․ It allows you to master the technique without expensive tools, making it a practical solution for maintaining your blades with professional-quality results․
1․3 Overview of the Sharpening Process
Sharpening involves maintaining consistent angles using a sharpening tool, such as a whetstone or steel․ The process begins by positioning the knife at the desired angle, then applying light pressure while stroking across the stone․ A DIY angle guide simplifies this by holding the blade steady, ensuring uniform bevels․ Regular, controlled strokes refine the edge, achieving razor-sharp results․ This method enhances precision, making it easier to maintain sharp blades with minimal effort and expertise․

Understanding Knife Sharpening Angles
Knife sharpening angles vary from 7-35 degrees, depending on blade type․ Smaller angles suit soft materials, while larger angles enhance durability for tools like axes and machetes․
2․1 Common Sharpening Angles for Different Knives
Knife sharpening angles vary based on usage․ Box cutters and kitchen knives typically use 7-15 degrees for slicing soft materials․ Pocket knives and general kitchen knives are sharpened at 17-22 degrees for versatility․ Survival and hunting knives require 22-30 degrees for durability, while axes and machetes use 30-35 degrees for heavy-duty tasks․ The angle choice balances sharpness and edge strength, ensuring optimal performance for the intended use of the blade․
2․2 How to Determine the Correct Angle for Your Knife
Determining the correct sharpening angle involves considering the knife’s intended use and blade geometry․ For general-purpose knives, a 17-22 degree angle is ideal, while survival knives benefit from 22-30 degrees․ Heavier tools like axes require 30-35 degrees for strength․ Use a protractor or angle guide to set the angle, ensuring consistency․ Folding paper can approximate angles, such as 22․5 degrees, for quick setups․ Matching the existing bevel angle helps maintain blade geometry․ Starting with a 20-degree angle is a versatile option for most knives․ Using markers for visual alignment and practicing on less important blades can refine your technique, ensuring sharpness and durability tailored to the knife’s purpose․
2․3 Relationship Between Angle and Blade Type
The sharpening angle is closely tied to the knife’s intended use and blade geometry․ Kitchen knives thrive at 17-22 degrees for slicing, while survival knives benefit from 22-30 degrees for durability․ Heavier tools like axes require 30-35 degrees for chopping․ The angle must match the blade’s purpose, ensuring optimal performance․ A smaller angle enhances sharpness for precision tasks, while larger angles improve strength for rugged use․ Blade type dictates the ideal angle, balancing sharpness and durability for specific applications․
Materials and Tools Needed
Gather sturdy materials like hardwood or aluminum for durability․ Essential tools include a protractor, drill, and sandpaper․ These components ensure precision and stability for your DIY project․
3․1 Essential Components of a DIY Angle Guide
A DIY angle guide requires a sturdy base, a protractor or angle template, and a blade rest․ The base ensures stability, while the template provides precise angle markings․ A securing mechanism, like a clamp or stop, holds the knife in place․ Optional features include adjustable stops for different blade types and a calibration system for consistent results․ These components work together to maintain the correct sharpening angle, ensuring a sharp, even edge every time․
3․2 Recommended Materials for Durability
For a durable DIY angle guide, use high-quality materials like hardwood or aluminum for the base and angle template․ Acrylic or stainless steel are ideal for the blade rest due to their resistance to wear․ Consider 3D-printed components for precision and customization․ These materials ensure stability, longevity, and consistent performance․ Properly constructed, your guide will withstand frequent use and maintain accuracy, making it a reliable tool for sharpening various knives effectively․
3․3 Tools Required for Construction
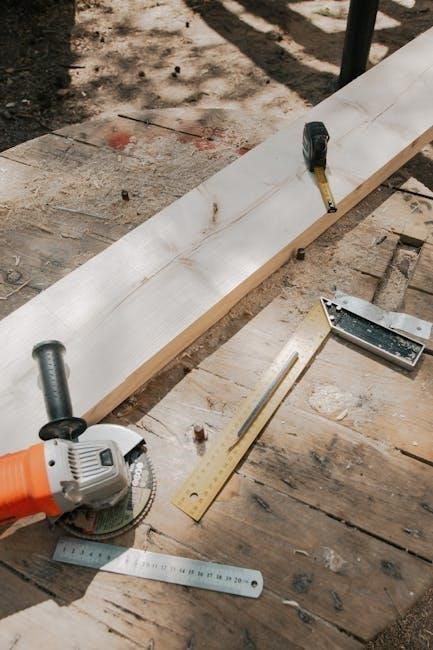
To build a DIY knife sharpening angle guide, you’ll need essential tools like a protractor for precise angle measurements, a saw or cutter for shaping materials, and a drill for creating holes․ Sandpaper or a file will help smooth edges, while clamps ensure stability during assembly․ Additional tools like a marker for marking angles and a ruler for alignment are also necessary․ These tools will help you craft a durable and accurate guide tailored to your sharpening needs․

Step-by-Step Guide to Building a DIY Knife Sharpening Jig
Design a sturdy base, craft an adjustable angle template, and assemble the components to create a precise sharpening jig․ Ideal for all skill levels, ensuring consistent results․
4․1 Designing the Base for Stability
Designing a stable base is crucial for effective sharpening․ Use a solid hardwood plank, at least 1 inch thick, to prevent wobbling․ Ensure the surface is flat and even, providing a firm foundation․ A sturdy base enhances control, making the sharpening process safer and more precise․ The choice of material and thickness directly impacts the jig’s durability and performance, ensuring consistent results for all your blades․
4․2 Creating the Angle Guide Template
Create an angle guide template using a protractor to mark precise angles like 20 degrees․ Trace the desired angles onto a durable material such as cardboard or wood․ Cut the template to fit your sharpening jig, ensuring it aligns with the blade’s edge․ This step ensures consistency and accuracy, allowing you to maintain the perfect sharpening angle for various knife types․ A well-made template is essential for achieving professional-level results․
4․3 Assembling the Components
Assemble the base, angle guide, and clamping mechanism securely using screws or glue․ Ensure the base is stable and the angle guide aligns perfectly with the blade․ Use a protractor to verify the accuracy of the angles marked on the template․ Attach the guide firmly to the base, making sure it can hold the knife at the desired angle during sharpening․ Proper alignment ensures precise and consistent results, while a sturdy build guarantees durability for repeated use․
4․4 Calibrating the Guide for Precision
Calibrate the guide by aligning a protractor to verify the marked angles․ Place a knife blade against the guide and adjust the screws or markers to ensure proper alignment․ Test the guide with a blade, checking if it maintains consistent contact with the sharpening stone․ Fine-tune the angle settings to achieve precision, ensuring the knife edge aligns perfectly with the desired bevel․ This step ensures accuracy and consistency during the sharpening process, guaranteeing razor-sharp results every time․
Using the DIY Angle Guide for Sharpening
Align the knife with the guide, ensuring the blade edge matches the desired angle․ Stroke the knife across the sharpening stone, maintaining consistent pressure and angle for precise results․
5․1 Aligning the Knife with the Guide
Place the knife in the guide, ensuring the blade edge aligns with the marked angle․ Use a protractor to verify the angle, resting the guide under the blade spine, not the bevel․ Maintain consistent pressure and stroke direction, keeping the knife steady throughout the sharpening process․ This method ensures precise alignment, making it easier to achieve a sharp, even edge․ For stability, consider placing the blade spine on a hardwood wedge during sharpening․
5․2 Maintaining Consistency During Strokes
Maintaining consistency during strokes is crucial for achieving a sharp edge․ Hold the knife firmly, using light to moderate pressure, and move it in smooth, even passes along the sharpening surface․ Keep the angle guide steady to ensure uniform contact․ Focus on maintaining the same stroke pattern and pressure throughout the process․ Using a consistent rhythm helps prevent angle drift and ensures a precise, even edge․ Practice this technique to master consistent sharpening results․
5․3 Adjusting the Angle for Different Blades
Adjusting the angle for different blades ensures optimal sharpening results․ For finer edges, such as on pocket knives, use narrower angles (15-20 degrees)․ For heavier tools like axes or machetes, wider angles (30-35 degrees) are more effective․ Use your DIY guide to precisely set the angle, ensuring it matches the blade’s intended use․ Smaller angles create sharper, more delicate edges, while larger angles provide durability for rugged tasks․ Always align the guide with the blade’s geometry for consistent results․
Techniques for Achieving the Perfect Edge
Master precision sharpening with techniques like protractor alignment, folded paper approximations, and controlled freehand strokes․ These methods ensure consistency and razor-sharp results for any blade type․
6․1 Using a Protractor for Accuracy
A protractor is an excellent tool for achieving precise angles during sharpening․ Place the protractor’s edge along the blade’s spine, aligning the desired angle (e․g․, 20° or 30°) with the bevel․ This method ensures consistent results and helps maintain the optimal angle throughout the sharpening process, making it ideal for both beginners and experienced sharpeners seeking precision control over their knife’s edge․
6․2 Folding Paper for Approximate Angles
Folding a sheet of paper is a simple, cost-effective method to estimate sharpening angles․ Fold the paper diagonally to create a 45° angle, then fold it again to achieve approximately 22․5°, which is close to the common 20° sharpening angle․ This technique provides a quick and easy way to approximate angles without specialized tools, making it ideal for casual sharpening tasks where precision is less critical but a rough guide is still helpful․
6․3 Freehand Sharpening with Angle Control
Freehand sharpening requires skill and practice to maintain consistent angles․ Start by aligning the knife spine with your line of sight and tilting the blade to the desired angle․ Light pressure and smooth strokes help achieve precision․ A protractor can be used to check and align the blade for accuracy․ For most knives, a 20-degree angle is ideal․ Practice this technique to develop muscle memory and improve control, ensuring sharp, even edges with minimal effort and maximum versatility․

Maintaining the Sharpening Angle
Maintaining the sharpening angle is crucial for consistent results․ Proper posture and grip, along with visual markers, help keep the blade aligned․ Regular drills ensure precision․
7․1 The Role of Posture and Grip
Proper posture and grip are essential for maintaining the sharpening angle․ Stand or sit comfortably, keeping the knife steady with a firm, controlled grip․ Ensure the blade aligns with the guide, using consistent pressure to prevent angle drift․ A stable posture helps maintain focus, while a secure grip ensures precise control during strokes․ This combination enhances accuracy and consistency, leading to a sharper, more durable edge․
7․2 Using Markers for Visual Alignment
Using markers or visual aids enhances precision by providing clear reference points․ Mark the desired angle on the blade or guide, ensuring alignment during sharpening․ This technique helps maintain consistency, especially for novice sharpeners․ Visual markers guide the knife’s movement, reducing angle drift and improving edge uniformity․ They can be applied with a marker or laser, offering a straightforward method to achieve accurate, repeatable results during the sharpening process․
7․3 Practicing with Drills for Consistency
Regular practice with drills is essential for mastering consistent sharpening․ Start with simple exercises like maintaining the desired angle through repeated strokes․ Focus on uniform pressure and stroke direction․ Use inexpensive knives for practice to build confidence and refine your technique․ Over time, muscle memory will develop, allowing for precise control․ Track your progress to identify areas for improvement, ensuring every blade leaves your sharpening station with a razor-sharp edge․
Common Mistakes to Avoid
Avoid inconsistent pressure and angle drift, which can dull the blade․ Ignoring blade geometry and steel quality also leads to poor results, undermining sharpening efforts significantly․
8․1 Inconsistent Pressure and Angle Drift
Inconsistent pressure and angle drift are common mistakes that can ruin the sharpening process․ Uneven pressure leads to an uneven edge, while angle drift causes the blade to sharpen at varying angles․ Both issues result in a dull, ineffective knife․ To avoid this, use a DIY angle guide to maintain consistent angles and apply steady, controlled pressure throughout the sharpening strokes․ This ensures a sharp, uniform edge every time․
8․2 Ignoring Blade Geometry
Ignoring the blade’s geometry is a critical mistake during sharpening․ Each knife has a unique bevel and edge shape, and failing to account for these can lead to improper sharpening angles and a weakened blade․ Using a DIY angle guide helps ensure the sharpening process aligns with the knife’s specific geometry, preventing damage and maintaining its intended performance․ Always consider the blade’s original design to achieve optimal results․
8․3 Overlooking the Importance of Steel Quality
Steel quality significantly impacts sharpening results, as harder steels hold edges better than softer ones․ Ignoring this factor can lead to inconsistent sharpening and reduced blade performance․ High-carbon steels, for instance, require precise angles to maintain their edge, while softer steels may dull faster but are easier to sharpen․ Understanding your blade’s steel type ensures proper technique and tool selection, optimizing the sharpening process and extending the knife’s lifespan․
Safety Tips for DIY Sharpening
Always handle sharp blades with care, wearing protective gloves and eyewear․ Maintain a stable position, keep fingers away from the edge, and ensure proper lighting to avoid accidents․
9․1 Proper Handling of Sharp Blades
Handling sharp blades requires utmost care to prevent injuries․ Always wear cut-resistant gloves and ensure the blade is securely positioned․ Use a stable work surface and maintain controlled strokes during sharpening․ Avoid distractions and keep loose clothing tied back․ Store blades in protective sheaths when not in use to minimize accidental contact․ Proper handling ensures safety and maintains the blade’s edge quality․
- Use a cut-resistant glove for protection․
- Ensure the blade is secure during sharpening․
- Keep loose clothing and long hair tied back․
- Store blades safely to avoid accidents․
9․2 Protecting Yourself from Accidents
Protecting yourself from accidents during DIY knife sharpening is crucial․ Always wear cut-resistant gloves and eyewear to prevent injuries․ Ensure your work surface is stable and free from distractions․ Keep loose clothing and long hair tied back to avoid entanglements․ Maintain controlled strokes and never sharpen towards your body․ Store blades securely when not in use to prevent unintended contact․ These precautions ensure a safe and effective sharpening experience․
- Wear cut-resistant gloves and eyewear․
- Ensure a stable, distraction-free workspace․
- Keep loose clothing and hair tied back․
- Store blades securely when not in use․
9․4 Using a Sharpening Steel as a Guide
A sharpening steel can be an excellent guide for maintaining the correct angle while sharpening․ By holding the steel at your desired angle, you can use it as a reference to align your knife during strokes․ This method ensures consistency and precision, especially for novice sharpeners․ The steel’s rigid surface helps prevent angle drift, allowing you to achieve a sharp, even edge effortlessly․ Combine it with a protractor for enhanced accuracy․
- Hold the steel at the desired angle as a visual guide․
- Use it to align your knife during sharpening strokes․
- Combine with a protractor for precise angle control․
Advanced Techniques for Precision Sharpening
Unlock precision sharpening with advanced techniques like micro-adjustments, honing, and combining jigs with freehand methods․ These strategies refine edges to perfection, ensuring optimal performance and longevity․
- Micro-adjustments for precise angle control․
- Honing and polishing for a razor-sharp finish․
- Combining jigs with freehand techniques for ultimate precision․
10․1 Honing and Polishing the Edge
Honing and polishing refine the blade’s edge to achieve a razor-sharp finish․ Using fine-grit stones or diamond hones, apply light pressure and maintain the desired angle․ For precision, employ a protractor or folded paper to approximate angles, ensuring consistency․ This step enhances edge durability and sharpness, making it ideal for high-performance knives․ Regular honing maintains the blade’s geometry, preventing dullness and extending its lifespan․ Combine with freehand techniques for a flawless edge․
10․2 Micro-Adjustments for Optimal Results
Micro-adjustments refine your sharpening process, ensuring the perfect edge․ Use a protractor to fine-tune angles, making incremental changes for precision․ For straight-edge knives, slight angle adjustments can enhance cutting efficiency․ Experiment with minor tweaks to accommodate blade geometry and steel type․ Start with small changes, test the edge, and adjust as needed․ This method ensures a customized sharpness tailored to your knife’s specific needs, elevating your sharpening skills to expert levels;
10․3 Combining Jigs with Freehand Techniques
Combining a DIY knife sharpening jig with freehand techniques creates a synergy that enhances precision and adaptability․ Start with the jig to establish a consistent angle, then transition to freehand strokes for finer control․ This hybrid approach allows for better adaptation to blade geometry and edge type․ It’s ideal for those who value both the structure of a jig and the creative freedom of freehand sharpening, leading to more refined and customizable results with practice․
Mastery of knife sharpening is achievable with a DIY angle guide, ensuring consistent angles and razor-sharp results․ Practice leads to perfection, and creativity enhances your sharpening experience․
11․1 Summary of Key Takeaways
Creating a DIY knife sharpening angle guide simplifies achieving precise angles, ensuring consistent results․ Common angles range from 7-15° for utility knives to 30-35° for axes․ Consistency is key to maintaining sharp edges, and using tools like protractors or folded paper can help approximate angles․ Practice enhances skill, and experimenting with materials ensures durability․ A homemade guide offers a cost-effective solution, making sharpening accessible and efficient for all skill levels․ Regular maintenance and proper technique yield razor-sharp blades every time․
11․2 Encouragement to Practice and Experiment
Sharpening is a skill that improves with practice․ Experiment with different angles and materials to refine your technique and achieve the perfect edge․ Don’t be discouraged by initial challenges—consistent effort leads to mastery․ Try various DIY guides and tools to explore what works best for you․ The journey of sharpening is as rewarding as the result, so keep exploring, learning, and refining your craft for razor-sharp success every time․
Additional Resources
Explore recommended books, online tutorials, and communities for deeper insights into knife sharpening․ Tools and materials are also available for further exploration and mastery․
12․1 Recommended Reading and Tutorials
Check out books like “Knife Sharpening: A Complete Guide” for in-depth techniques․ Online tutorials from Lifehacker and video guides by experts like Alex offer practical steps․ Explore YouTube channels for hands-on demonstrations and tips․ Websites like Sharperal provide detailed angle guides and sharpening hacks․ Use protractors and folded paper for quick angle references․ Community forums and DIY blogs share creative solutions for homemade jigs and precision sharpening․
12․2 Online Communities for Sharpening Enthusiasts
Join online forums like BladeForums and Knifetalk to connect with sharpening enthusiasts․ Share tips, ask questions, and learn from experts․ YouTube channels offer step-by-step tutorials, while Reddit communities like r/knives provide valuable insights․ Social media groups dedicated to sharpening share creative hacks and DIY projects․ These platforms foster collaboration, helping you refine your skills and stay updated on the latest techniques and tools for precision sharpening․
12․3 Tools and Materials for Further Exploration
Explore advanced tools like precision protractors, adjustable sharpening jigs, and ceramic honing steels․ Consider materials such as hardwood for custom guides or 3D-printed templates for intricate designs․ Sandpaper and diamond stones offer alternative sharpening surfaces․ Online tutorials and hardware stores provide a wide range of resources to enhance your DIY projects․ Experimenting with these tools and materials can help refine your sharpening technique and expand your creative possibilities․